October 07, 2015
How to find BMW F-series current I-level with ENET E-sys coding cable
What is an I-level (integration level)?
TheI-Level (German:I-stufe) is the Integration Level of your car, which represents a package of firmwares for all your modules, and it corresponds to the version of ISTA/P last used to program your vehicle.
The I-level is a set of numbers:like E89X-11-09-410. The first part represents the chassis group, which is followed by theyear and month of the release and a build number for that release. So, E89X-11-09-410 would mean a E80/E90, 09/2011,version 410.
Equipment:
ENET (Ethernet to OBD) Interface Cable, like €13 in obdtool.co.ukBMW E-SYS ICOM F-Series coding software
A laptop running Win XP operating system
With proper E-sys cable, you can check to see if the vehicle you are connected to has the ISTA/P v2.54.2 or v2.54.3 version of software.
Check the level of firmware installed in the F-series chassis BMW. Refer the cable list above first Connect the ENET E-sys coding cable with vehicle via OBD socket Click the Expert Tab on the far left menu bar
Select the VCM Module tab Locate the VCM ‘Master’ tab Locate the IÂ-Steps section Click Read.
This will then show you the current I-level on the vehicle. If the I-level matchesthe ISTA/P Version for Px.54.2 under your specific chassis, you have theaffected firmware.
cable de codage BMW ENET E-SYSX Cable E-SYS ICOM Coding F-Series for BMW
Posted by: obdtool at
07:07 AM
| No Comments
| Add Comment
Post contains 253 words, total size 4 kb.
BMW Scanner 1.4.0 VS 2.0.1 VS 2.20 K+Dcan
Every BMW owner knows BMW Scanner series, especially BMW Scanner1.4.0car diagnostic tool for its low cost and high efficiency, do all kind of stuff including very easy coding. Here I would like to make a comparison between the three popular devices, they are BMW Scanner 1.4.0,BMW Scanner 2.0.1 and BMW Scanner 2.20 K+Dcan.
Vehicle models they support:
I know 1.4.0 supports models:
E38(7')
E39(5')
E46(3')
E53(X5)
E83(X3)
E85(Z4)
and 2.0.1 supports:
E60/E61(5')
E63/E64(6')
E65-E68(7')
E70/E71(X5/X6)
E81/E82/E87/E88(1')
E90-E93(3')
BMW Scanner 2.20 k+Dcansupports the same models, or it support more earlier moddels like 1.4.0. and that is the difference between 2.0.1 versus 2.20 k+Dcan in function range, coding ant etc. 2.20 k+Dcan to work on newer models need to remove pin 8 from obd connector,
Some info got that here is the quote from a BMW thread:
"Since 2006/03, BMW use" Dcan", means that diagnosis use no KL15, so as GT1,need to change the OBDII cable.
The old OBDII cable cannot use on cars which was assembled after 2006/03.
And Since SOP 2008/09, you must remove pin 8 then you can do everything."
Coding:
When I first used BMW Scanner 1.4 I fell in love from first time use until i startedusing more and more and i got disappointed with it (Incorrect Index) When I first used Scanner 2.xx I always keep in Mind CAS - Bricking When I first Used INPA-Suit i used DIS along with Progman..... Until i bought a Car just too learn how to code with INPA-Suit since CarSoft BMW messed up during
Service Reset, and after a Week of Loading, translating, reading, trying I learned.... after few more cars I learned been faster.
Conclusion:
1.4 is VARY SIMPLE
2.x VARY Complicated
Both of them are limited.
Hope this helps.
Posted by: obdtool at
06:49 AM
| No Comments
| Add Comment
Post contains 300 words, total size 7 kb.
BMW Creator C310 vs. C110 vs. C100 Code Reader
Heat discussion is raised among BMW Creator C310, C110 and C100
code reader in
http://www.bmwland.co.uk/ forum. Following part displays differences and similarities among C310, C110 and C100 scanners.
Function:
C110 code readersupports read trouble codes, clear trouble codes, displays live data stream, Component Testing, Clear adaptation and vehicle version information.
C310 scanner supports read trouble codes, clear trouble codes, displays live data stream, Component Testing, Clear adaptation, vehicle version information and oil reset
C100 code reader supports read trouble codes, clear trouble codes, displays live data stream, Component Testing, Clear adaptation, vehicle version information, Performs modules present test
Supported Language:
Both C310and C110 scanner support English and German language. While C100 supports multi languages like English, Chinese and Japanese etc
Update:
Three of them support free update online. C110 has released to the latest version is V3.8, C310 released to V4.4 and C100 released to V3.7.
Vehicle Coverage:
C110 support BMW 1 Series, 3 Series, 5 Series, 6 Series, 7 series, 8 series, X series, Z series and Mini vehicle models from 2000 to 2011.
C310 support BMW 1 Series, 3 Series, 5 Series, 6 Series, 7 series, 8 series, X series, Z series and Mini vehicle models from 1997 to 2013.
C100 OBD2/EOBD code readerworks on all 2001 or later OBDII compliant PETROL European vehicles. It can also works on all 2004 and later OBDII compliant DIESEL European vehicles and all 1996 and later OBDII compliant US and Asian vehicles.
In conclusion:
These three hand-held code readers perform similar functions. C310scanner supports oil reset function while C110 and C100 can not.
They work on BMW vehicles from different years.
C100 covers more language than the other two scanners.
Posted by: obdtool at
06:21 AM
| No Comments
| Add Comment
Post contains 288 words, total size 9 kb.
Latest V4.8 BMW Creator C310 Scan Tool
Creator C310 BMW scan toolwith the latest version 4.8 software has now been available on Eobd2. As a hand-held device, Creator C310 code reader can do basic diagnostics for BMW with only €50.00 here.
V4.8 BMW Creator C310 for BMW Functions:
1. Read and clear trouble codes;
2. Clear trouble codes;
2. Displays live data stream and graphdisplay and vehicle version information;
3. Clear adaptation;
4. Engine oil reset.
Creator C310 V4.8 Software Free Download:
Supports BMW between 1997 to 2013:1 Series: 1'_E81/E81/E87/E883 Series: 3'/Z3_E36,3'_E46,3'_E90/E91/E92/E935 Series: 5'_E39,5'_E60/E61,5'_GT(F07),5'_F10/F116 Series: 6'_E63/E64,6'_F12/F137 Series: 7'_E38,7'_E65/E66,7'_F01/F02/F03/F04X Series: X3_E83,X5_E53,X5_70,X6_E71,X1_84Z Series: 3'/Z3_E36,Z4_E85/E86,Z4_E89MINI: MINI_R50/R52/R53,MINI_R55/R56Include : Drive , Chassis and Body all system
For differences among C310, C110 and C100, please check the following link:
Posted by: obdtool at
06:02 AM
| No Comments
| Add Comment
Post contains 140 words, total size 3 kb.
New Arrival Super ICOM Latest V2015.03 Software
Icom software installed base on Windows 8.1 64Bit OS, fit for most of PC/laptops in the market with SATA port.
Current software version: 2015.03:
ISTA-D: 3.47.30
ISTA-P: 3.55.0.100
VIN: 2015.03
Super ICOM software V2015.03 Highlights:
1. Support BMW diagnostic, coding and programming;
2. Free update for one year on official website (www.supericom.com, while after one year, update fee is300USD/year or 50USD/time)
3. Full repair article and writing diagram is available with multi-language, check details as follows:
ISTA D: French, German, Greek, Italian, Japanese,Korean, Portuguese, Russian, Spanish, Swedish, Thai, Turkish;
ISTA-P: German, British English, American English, Swedish, Spanish,Italian, French, Greek, Japanese, Czech, Korean, Indonesian, Chinese, Taiwanese,Turkish, Dutch, Portuguese, Russian, Thai, Polish.
4. Use directly and easily;
1). USB key inside parcel;
2). Software is preinstalled;
5. Dealer level product;
6. All SATA format laptop or computer meetsthe following demands:
CPU: IntelCeleron 2.0 and above (i5 Recommend);
RAM: 2 GB and above (4 GB Recommend);
USB: 2.0 and above.
Super ICOM software display:
Posted by: obdtool at
05:48 AM
| No Comments
| Add Comment
Post contains 188 words, total size 6 kb.
DIY program BMW E46 key with AK90 key programmer
Back Story:
So when i first got my E46 325 convertible it came with 1 key (diamondshape) this worried me, i asked dealer local to me who sniggered and said itwould be a "£150 custom order from Germany†to get another one. Not immediatelyneeding one and slightly knocked back i declined and was back to square one..
I did hours of reading about it from all across the internet and now ihave located the correct method for achieving a key and much cheaper.
Being a software developer/ general techie by trade i was not put off bythe challenge!
Tools needed:
o
New unprogrammed key internals + chip (the chip is important)- I got fromeBay (£20 delivered – took 1 and half weeks)
o
Key case (new)-£3.20 delivered
o
Key cut (for the lock of car) – Local key smith £6
Thats allyou need..
So already thats a total of: £75ish saving you aprox £100
Step 1: Remove the EWS Module (or immobilizer module from the car)
This is located here under the steering wheel of the car behind all theplastic trim:
What you need to do is remove 2 screws (possibly 3) mine might have beenmissing 1 so check all along the trim:
Once undone the trim panel should pull down.. like this:
If you stick your head up inside there you should see a white box this isyour EWS or immobilizer unit for the car:
this is what we need to take out of the car.. it is held in by 2 plastic 10mm nuts on a clever but very fiddly to get at bracket. Once both bolts are undone the unit should just hang down.
The is a black plug on one side of the unit you need to push down on the tab and it should slide out.. here is the plug so you can see how that works:
Thats it.. you should now have the EWS unit out of the car this is all youneed:
Step 2: Software Install
I have provided the software i used with the AK90 programmer over at my downloads page here:
Edit: I have had reports the software didnt open correctly so i have provided another setup..
Download and extract to a folder where you can see/use it for example your desktop
The first step is to plugin the AK90 using the provided usb cable windows should automatically detect and start drive install (im using Win 7) the unit will beep dont worry. It will fail on driver install at this stage thats only so we have the unit plugged in ready to be installed.
Run: AK90+ setup.exe hit next and install to default path.
Once finished you should see two icons appear on desktop:
At this stage you need to install the drivers and make the drive work sohit:
CP210x_USB.exe
Follow the install to the end and make sure "Launch the CP210x VCP driverinstaller†is selected, hit install and ok.
Replug the AK90 windows will now say the driver is installed.
Make sure to restart your pc to confirm the drivers/software install.
Step 3: Open Software and read key
Double click the AK90 icon on your desktop, the software should launch andyou should hear it beep and click a few times.
This is good it means the computer has found the device on the com portand we are ready to go!
Lets test your key, place this in the slot in the AK90 programmer likethis:
In my case this is the garage key/valet key im programming just to showeveryone how to do it, i originally did this with the diamond key i purchasedthe process is the same.
Go back to the software and select "test key†this will read the data fromthe key and a box like this will pop up:
So as you can see the device has worked out its a key for EWS3/4 anddoesnt currently have a VIN or any mileage data.. this is good it proves its ablank virgin key.
Here is my current diamond key tested(with my vin cut out):
So we have proved the device works and is talking to our computer nowwhat? its time to program our blank key to the module we took out earlier.
Step 3: Connecting the EWS module to programmer
Take your EWS unit and open the top, this folds open like this:
The circuit board is held on the far side by the black plug the is 4 bitsyou have to push in and slide the unit out:
Now we take the connector wire for the programmer and carefully attachthis onto the circuit board, in this case the wire has a big red dot on it. Weneed to line this up with the dot on the chip:
What i did was made sure that the connection between the chip and theconnector was at its best is to make sure that every pin on the circuit boardis bare metal. I scratched gently with a small blade/screw driver to make theconnection good.
Make sure you note down the chip type in my case it is: OD46J (thisis important)
And then connected the wire
Connect the other end to the AK90..
Step 4: the actual programming
Open up the AK90 software which should still be open from earlier andclose the test key box you should just have a software screen that looks like:
With the blank key out of the slot and the EWS unit connected:
Select your chip type from the drop down that you noted down earlier minewas: OD46J
Hit read EWS a warning message will appear double check you haveeverything connected and hit ok
Once donea save dialogue will appear just save this file to your desktop,basically this is a backup of the data from the chip
You should see a screen of random letters and numbers:
This is the EWS data we have collected from the module..
If you hit EWS analyse this reads the data and tells you what keys arebeing used, mileage and the VIN number.
This is the screen where you can disable and enable current keys (handy ifyou lost one)
Press exit and lets program a new key!
You should be at the main screen with all the numbers and letters on,place your virgin/new key into the slot on the AK90 and select write key
a screen should pop up:
This is where you select the key slot you wish to write this in my casethat would be key slot 7 (no idea where the other 4 keys are! i only have 3)
Select the slot and select write key you will get a warning making surethat you have placed key in slot just select yes (obviously making sure the keyis in the slot first!)
The device will make some chirping noises and beeps as it writes to EWSunit:
After aprox 1-2mins you should see confirmation that the keys data iscoded
Press OK a new box will pop up:
Select the chip type from earlier (see the warning i told you this wasimportant!
AK90 is now coding the key back into the EWS!
Wait for aprox 1-2mins and you should see:
Press ok, thats it you have coded your ews data to the key and then backto the ews unit.
Id recommend testing the key now again (hit test key)
Step 5 ut EWS unit back into car
Same process as before but in reverse.. can be a bit fiddly but stick atit..
What i did was place the EWS unit back in place and with my other hand puteach nut on finger tight and then fully tightened up with a small socket
Posted by: obdtool at
03:51 AM
| No Comments
| Add Comment
Post contains 1290 words, total size 38 kb.
August 10, 2015
Use VCM II to enable auto wipe/headlights with alarm on Ford Transit 2009
How toprogram Ford Transit GEM module using FORDVCM IDS?
First of all, a pic on what it is like in the dark:
Looksreally good right? Now let us find out how to make this.
Vehicle:Ford Transit 2009 and onwards
Auto parts required:
Rain/light sensor with plug & lengh of wiring - part no - 3S7T-17D547-AB
Rain/lightsensor bracket/covers part no's F1488557, F1710216 & F1687666
headlampswitch with auto lights - part no 4M5T-13A024-DA
GEM module(MUST have CTM CL RKE AS on label) Part no 9T1T-15K600-ED
Antipthefthorn part no 2T1T-13832-AD
Bonnetswitch part no F3553259
Rainsensor wiring details:
Pin 1 onsensor connect to Pin 8 on headlight switch
Pin 2 onsensor connect to GND
Pin 3 onsensor connect to GEM connector BL pin 22
Autolights wiring details:
Pin 4 onheadlight switch connect to GEM connector IPR pin 21
Alarm wiring details:
Anti-thefthorn connect to GEM connector IPL pin 1
Pin 1 onBonnet switch (hood ajar) connect to GEM connector BL pin 23
Pin 2 onbonnet switch connect to GND
Beforeconnecting VCMIItovehicle, you need to unplug GEM module, disconnect toughbook/laptop frominternet
and thenrun Ford VCM II IDS (by disconnecting from internet, IDS ca not downloadvehicles "As Built Data"). Once IDS
has communicatedwith vehicle. Select Module programming and then Programmable moduleinstallation (PMI).
SelectGEM, IDS will attempt to download "as built data" it will then giveoption to manually configure GEM module.
Selectmanual configuration & enter the following codes when instructed too.(There are 3 programming codes to enter
in - 1 ata time, shown in yellow box below)
Once doneIDS with ask for module to be installed. At this point plug GEM module back in,and follow instructions on IDS to complete process
Now youhave automatic wipers and headlights with Alarm.
BestQuality VCM II Diagnostic Tool For Ford With Multi-Language:
Posted by: obdtool at
04:37 PM
| No Comments
| Add Comment
Post contains 332 words, total size 15 kb.
Ford VCM II IDS updated to V96
Ford VCM 2 diagnostic interface IDS software has just updated to V96.
IDS (Integrated Diagnostic System) V96
English/German/French/Italian/Spanish/Dutch/Slovenian/Finnish/Danish/Norwegian/Portuguese(European)/Portuguese(
Brazil)
VCM II IDS V96 new features:
Release R96 includes software for the IDS (Integrated Diagnostic System) tool. Diagnostic coverage includes most 1996 - 2016 MY (produced 1995 - 2015) Ford and Lincoln/Mercury vehicles.
Coverage has been extended with the following additions:
FORD
Model additons
North America
2015 GT350/GT350R
2016 GT350/GT350R
2016 Mustang
2016 Fiesta
2016 Transit Connect
FORD
Model additions
Rest of World
2015 Everest (Thailand)
2016 Navigator (China)
2015 Figo (India)
2015 Everest (FSAO)
2016 Focus (AP)
2016 EcoSport (FSAO)
2016 Ka (FSAO)
2016 Taurus (China)
2016 Mustang (China)
Note:
IDS V96 is not confirmed working with all available VCM II in China market, so the above extended vehicle coverage is only for reference.
VCM II interface with WIFI is compatible with IDS V96, but if you want to run IDS V96 on the WIFI VCM II, the WIFI function will be disabled; and if you want the WIFI function, you have to run IDS V86.obd2express.co.uk engineer record both IDS V96 and IDS V86 into one CD, you are free to choose any of version to use.
The workable VCM II hardware:
To upgrade from the old version to IDS V96, the user is advised to ship back VCM II multiplexer to obdtool.co.uk, then get the multiplexer reworked the new chip, the upgrade charge 20USD + shipping cost.
Note: only the VCM II with newest serial number is able to upgrade. VCM II with serial number 31605352 can't upgrade because it's locked.
Posted by: obdtool at
04:27 PM
| No Comments
| Add Comment
Post contains 321 words, total size 26 kb.
Volvo V50 Tachometer correction with digiprog 3 (fixed)
Problem before entering:
I have downloaded a Germanversion user manual and soldered3 wires as shown in German manual (checked pinnumbers). Adapter 51 has 4 wires.Pin 25 (white on original, or orange on clone) left unsoldered. I'm getting"ERROR INIT" message on screen. Processor is MC9S12DG128B. I selected HCS12 in digiprog 3.
What I'm doing wrong? Then I contacted my dealer.The obdtool.co.uk technician helped solve the trouble. It should work for whomhas DP3 on this dash.
I checked the Volvo V50 HCS12user manual withdigiprogiiiagain, and noticed that at least 4 wires,vss, vdd, tx and rx should be soldered.
I posted the attachmentthey provided.
VOLVO V50 TACHO
1. Remove and disassemble tachometer.
2. Connect as shown in the photo above the plug 51 withthemarked soldering points. 3. PICTURES on the following page
4. Select the program: cars / trucks -> VOLVO -> V50 HCS12.
5. The DIGIPROG displays the old / wrong Mileage.
6. Program and completed the new / correct Mileage.
NOTE: Pin-signal= end of white wire in first picture
The job needs good soldering/desoldering skill. Lucky, the problem was settled.
Posted by: obdtool at
04:12 PM
| No Comments
| Add Comment
Post contains 204 words, total size 8 kb.
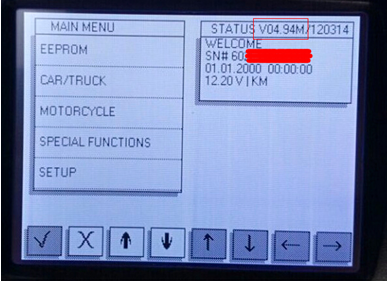
Uplander 08 mileage via digiprog 3 V4.94 pinout and cable number
Problem: I have one digiprog 3 v4.94 version, and want todo 2008 Uplander 9S12H256 but it’s not in the menu. I need pinout or picture ofconnection and cable number.
SOLVED! It went well, itsSt48 cable, colors marked in picbelow. Set type to eeprom/MCU/9s12. Read processor, save file, double checkoriginal mileage calc with tachosoft (Uplander 2008 9S12H256), manually changethe file and write. Bingo!
Posted by: obdtool at
04:03 PM
| No Comments
| Add Comment
Post contains 94 words, total size 6 kb.
August 09, 2015
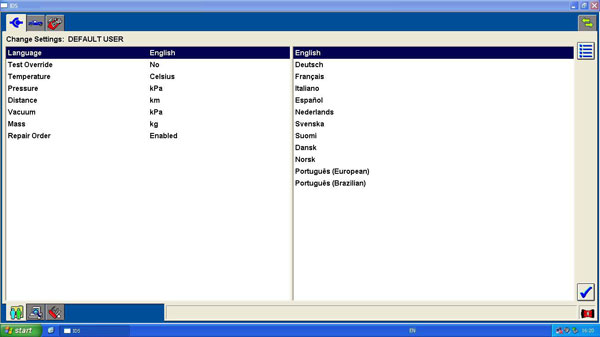
How to tell different Digiprog â…¢ Digiprog 3 V4.94 packages?
There are several different
DigiProg 3odometer correction tool packages available in eobd2.fr. What’s the differentamong Digiprog 3 SM47 series: SM47 to SM47-F? Please check the table listbelow:
|
Item No
|
SM47
|
SM47-B
|
SM47-D
|
SM47-E
|
SM47-F
|
|
Product Name
|
|
|
|
|
|
|
Software
|
V4.94
|
V4.94
|
V4.94
|
V4.94
|
V4.94
|
|
Language
|
Deutsch, English, Espanol, French, Portuguese, Italiano, Turkish, Nederlands.
|
Deutsch, English, Espanol, French, Portuguese, Italiano, Turkish, Nederlands.
|
Deutsch, English, Espanol, French, Portuguese, Italiano, Turkish, Nederlands.
|
Deutsch, English, Espanol, French, Portuguese, Italiano, Turkish, Nederlands.
|
Deutsch, English, Espanol, French, Portuguese, Italiano, Turkish, Nederlands.
|
|
Power-On password
|
1
|
1
|
1
|
1
|
1
|
|
Manufacturer
|
SM47 and SM47-B made by same manufacturer
|
SM47-D and SM47DZ made by same manufacturer
|
SM47-E and SM47-F made by same manufacturer
|
|
Package
|
Full package with ST01 and ST04 cable
|
Main unit and OBD2 cable
|
Full package
|
Full package
|
Main unit and OBD2 cable
|
|
Update
|
Via Email
|
Via Email
|
Via Email
|
Send back to factory to update
|
Send back to factory to update
|
|
Vehicle coverage
|
Comprehensive
|
Vehicle coverage may slightly different from different manufacturers
|
|
Odometer correction way
|
The same as SM33 series, some need to dissemble the dashboard, some via OBD. Follow the system prompts.
|
DIGIPROG 3 FAQ:
About vehicle model:
Q: Does Digiprog III change mileage for BMWafter 2008year? Does Digiprog3 make key for BMW?
A: Better use Digimaster 3 to programmileage for the high-end BMW. Digiprog3 can't make key for BMW, advice you useAK300 key pro.
Q: Does digiprog3 work with VW golf 6 2009,golf 5 2006 and Peugeot 407 2006?
A: Yes. Digiprog 3 does. Please refer todigiprog3 vehicle list at:
Q: I use digiprog3 (item No.SM33-C) to workwith Opel Astra 2004, and the manual suggests use No.1 cable, this cable isST01?
A: Yes, No.1 cable is ST01 cable, and thesoftware needs to open off-line programming or online-programming.
About device and accessories:
Q: what is Digiprog III power-on password?
A: Digiprog 3 Power-on password is 1. Afterenter password "1",
click tick" √"not " X",otherwise Digiprog3 will freeze.
Q: What is ST01, ST04 cable used for in thepackage of Digiprog 3 (SM33-C)?
A: It needs to remove chip when you programmileage for some car models. One end of the ST01 cable and ST04 cable clip thechip, and the other end connect to digiprog3.
Q: What is the difference between tacho pro2008 and digiprog 3?
A: Tacho pro 2008 and digiprog 3 share thesame function. But tacho pro works with the car before 2006 year, digiprog 3works with the car even up to 2012 year.
Q: Can I use Digiprog3 (item No.SM33) ST01cable and ST04 cable to work with Yanhua brand Digiprog 3(item No.SM33-B)?
A: Yes, you can, but Yanhua brand Digiprog3(item No.SM33-B) is better use this following adapter in the package, it worksbetter and more stable.
Posted by: obdtool at
09:33 AM
| No Comments
| Add Comment
Post contains 518 words, total size 28 kb.
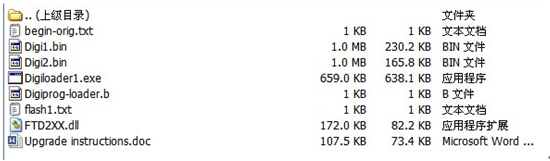
Digiprog 3 V4.94 Software Update Tips
You are available to
V4.94 Digiprog 3 Update Serviceon obdtool.co.uk, which can update your oldversion Digiprog 3 software to the newest one with only €39.00.
Howto update Digiprog3 V4.88 mileage correction tool to the newest V4.94?
1. Place an order for V4.94 Update Service,and leave your serial number on your order. Software will be sent via E-mail.
2. Of course, you also can directly buy thenewest V4.94 Digiprog 3 OdometerProgrammer.
Digiprog3 Update Tips:
1. Do not update the digiprog 3 onlinewhen you use;
2. Disable any anti-virus software on yourcomputer before running an update;
3. Make sure your computer will not becomestandby status when updating. Computer power must be well connected. Updatewill take 15-20 minutes;
4. If your Digiprog 3 Serial Number is not590C8F0E0000, 24CC65070000 or AFD68C070000, it might cause blue problem.
5. Please confirm the update file iscomplete as display below, or will cause blue screen too.
If needed, you can browse through obdtool.co.uk Page to get more technical support onDigiprog 3.
Posted by: obdtool at
09:29 AM
| No Comments
| Add Comment
Post contains 175 words, total size 4 kb.
Digiprog 3 and Digimaster 3 odometer correction Table comparison
Digimaster 3 and DigiProg 3 both are branded and respected odometer correction tools on theaftermarket. What’s the difference between these two km change tools? Pleasecheck the Table list below:
|
Item |
|
|
|
Image |
|
|
|
Software Version |
V4.94 |
1.8.1407.14 |
|
Screen Size |
Smaller |
Bigger |
|
Language Supported |
Deutsch,English, Spanish, French, Portuguese, Italian, Turkish, Dutch
|
Englishonly |
|
Way to change mileage |
Via OBD2,dashboard or chip |
ViaOBD2, dashboard or chip |
|
Quality |
Copyhigh quality |
Original Yanhua |
|
Operation |
Willcause blue screen problem if operate improperly |
Noblue screen problem |
|
Register |
Noneed to register |
SP78no need to register
SP78-Bneed register with ID and password |
|
Update |
Updateby email or send the back to factory to update. |
Updateonline at anywhere anytime. One yearfree update. |
|
Power-on password |
"1†|
NO |
|
Vehicle list |
Foruniversal car, but cover less vehicle models than Digimaster 3.
|
TheBest odometer tool for universal car, such as ford, BMW, Toyota, Benz, VW,Audi, Volvo, Renault, Peugeot and high-end cars. |
|
Vehicle year |
Coversvehicles from 1996 to 2013 (some can do 2014 year) |
Coversvehicles from 1996-2014 |
|
Token |
Notokens limited |
ItemNo.SP78 no token limitation, ItemNo.SP78-B with 980 Tokens |
|
Function |
Mainlyfor setting and programming digital speedometer. |
odometercorrection, Audio decoding, airbag resetting, engine ECU resetting, IMMO,programming key for Benz &BMW etc |
|
NOTE:
1)
Digiprog 3 cannot do Ford,For Benz, BMW, Opel vehicle well, but digimaster 3 can.
2)
For the new and high-endcars, you need to use Digimaster 3.
3)
Digiprog 3 supportmulti-language, but Digimaster 3 comes with only English.
4)
Digimaster 3 supports other additionalfunction like: programming new keys for BMW and Benz, CAS-BDM reading/writingand resetting; 35080V6 erasure etc. But Digiprog 3 cannot. |
For detail vehicle list and user manual, please check obdtool.co.uk webpage.
Posted by: obdtool at
09:23 AM
| No Comments
| Add Comment
Post contains 276 words, total size 23 kb.
July 19, 2015
FGtech V54 read and write SF10Fxx (K-Line) via Tircore Boot Mode
I have tested some other models:
EDC16U1 (VAG) Read/Write ok (OBD)
EDC15V (VAG) Read/Write ok (OBD)
Audi A6 (TRICORE BOOT)
E70 3.0D EDC16 (BDM)
Renault Delphi 2007 k-line
I use
FGtech V54want to
read and write SF10Fxx (K-Line) via Tircore Boot Mode, and success, now, I share the process for how to do it.
1. Connection, and install software
2. After well install and connect FgTech galletto master v54, come to software main program, select vehicle and engine type
3. Select "Read†and then "Writeâ€, well, it is quite easy
Posted by: obdtool at
04:56 PM
| No Comments
| Add Comment
Post contains 99 words, total size 3 kb.
How to Use Benz Vediamo Variant Coding function
Mercedes Benz Vediamo engineering software can project any online car program, setting code, change the SA Code function. The Vediamo V5.05 software can only worked with WIFI
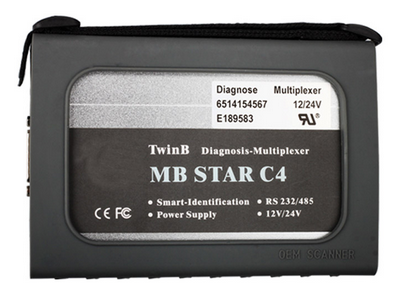
MB SD Connect Compact 4 diagnostic system. Following are detail instruction on doing Variant coding function with Vediamo.Well install
Vediamo V5.05 software
and then go to Variant coding sectionThe current state of the variant coding can be read and modified with Ecoute. Proceed as follows:–Select Coding / Variant coding in the Ecoute main menu.–The variant coding dialog is openedIf preconditions for variant coding are specified in the system description for the current ECU variant, these are executed when the window is opened. If services with input parameters are specified as preconditions, an appropriate dialog is displayed in which the user can enter the parameters.Current CodingThe current coding string from the ECU is read and displayed when the dialog is opened. Fragments and values (max. 4 lines) matching the coding are displayed in a list field. If the coding is not found in the parameterization, "unknown†is entered under values.The coding string can be displayed either in decimal or hexadecimal format depending on the setting in Vediamo.ini. The coding string format is specified by the "VarCodStringFormat†entry in the [ECOUTE] section of Vediamo.ini. This entry can have the value "Decimal†or "Hexadecimalâ€. The value "Decimal†means that the coding string is displayed in decimal form. The value "Hexadecimal†means the coding string is displayed in hexadecimal form. The coding string is in decimal format by default.SelectionAll parameterized fragments of the selected service are displayed along with their values in this section of the dialog. The filed Coding string contains no values when the dialog is opened. As soon as a value is selected from the list, the corresponding coding string is displayed immediately. In addition, the difference between the current coding string and the selected coding string is evaluated and the position where the two strings differ is marked with the numerical value of the difference (decimal: absolute value of the difference of the two values; hexadecimal: bitmask of changed bits).Externally parameterized coding fragments: Coding fragments which are parameterized by way of external files (ccf suffix), are denoted in the dialog by the suffix (ex).Save to FileThe variant coding can be stored in a snapshot file by clicking this buttonCloseClicking this button closes the variant coding dialog. After the button is pressed, any postconditions regarding variant coding included in the system description are executed, in the same way as the preconditions described above. If the option shut down cycle for coding is activated in the VSB and coding was performed in Ecoute, the shut down cycle dialog is then opened. The dialog prompts the user to turn the ignition off and then on again.Manual CodingClicking on the button Manual coding opens a dialog, in which the coding string can be edited manuallyThe coding string in the edit field is taken from the selection field. If the selection field does not contain a string, the coding string is taken from the field of the current coding string. The user can edit the coding string and execute the variant coding by clicking on the ECU-Coding button. The dialog is closed without coding by clicking on the button "Closeâ€.You have the possibility of naming your own coding strings and storing them in a list (Add to list button). Strings in the list can also be deleted (Delete button). The compiled list can be stored in a file (Save file), or previously compiled lists can be loaded from a file (Open file). This is particularly useful when the number of combinations is very high and working with your own selection lets you work more effectively.The coding string loaded from the file is displayed in a decimal or hexadecimal format, according to the parameter VarCodStringFormat in the file Vediamo.ini. The format in which the string is stored in the file might be decimal, hexadecimal or even mixed (p.e. "123 001 5D 7F 111″) and it has no influence on the display and entering format.
http://www.eobdtool.co.uk/wholesale/latest-version-mb-sd-connect-compact-4-star-diagnosis.html
Posted by: obdtool at
04:49 PM
| No Comments
| Add Comment
Post contains 682 words, total size 5 kb.
Retrofit W164 rear LED tail lights with Star diagnosis detail guide
Here is the step-by-step procedurefor the MercedesBenz W164 ML 2009 LED tail light upgrade,including the Star Diagnosis recoding rear SAM procedure.
Mercedes Model: 2006-08 W164 with OEM LED tail light
Tools needed:
8mmwrench
2needles
1 pair ofLED tail light, US or Euro specs
ML W164rear SAM with LED tail light capabilities
Time: the whole procedure takes under 1 hour
Procedure:
Remove rear SAM
1.
Remove cover form load compartment side trim. SAM is located underneath the fuse and relay box.
2.
remove plastic covering over SAM
3.
remove all electrical connectors
4.
unclip SAM control unit upwards out of retaining clamp
5.
remove connectors to old halogen tail light
Install new rear SAM
1.
Replace old SAM with new SAM, one with LED tail light as option. Known partnos. that work with LED tail lights are 164 900 72 00 and 164 440 41 01.
2.
Reconnect all connectors
Program new rear SAM
2.
Variant code the rear SAM to LED with the correct setting.
Stardiagnosis rear SAM variant coding picture instructions in Developer Mode:
Rewire the brake light wire to tail lightconnector
For W164with the brake light socket connected to a set of wires
1.
Detach the red wire from the harness connected to wires to the bulb socket,using thin needle to disengage the locking mechanism from both sides of themetal contact
2.
Insert to the empty port (no.4 maybe) of the central the only harness to thelight assembly. You may have to open the clip on the side to allow the metalcontact slide into place.
Remove and install tail lights
1.
Unscrew 3 bolts from rear and 2 from side, then carefully slide light backwards(not sideways)
2.
Install new lights in reverse order. Make sure that foam seal is attached tothe new lights for weatherproofing.
3.
Now all done and test your tail lights
Posted by: obdtool at
04:26 PM
| No Comments
| Add Comment
Post contains 342 words, total size 20 kb.
Mercedes MB Star Diagnosis software update to V2015.7
Softwareversion: 2015.07
500GB V2015.7 DELLD630 software HDD
Or 500GB V2015.7 ExternalFormat software HDD
2015.7 software HDD new features:
1) Xentry adds new 204/207/212/221and Smart454 452 451 450 models, Support cars, trucks, Sprinters,smart, etc
2) 2015.7 software add new car of B 246, CLS 218, SLK172, etc
3) The car PL69 isadded to the price list
4) XENTRY start/stop at quick speed
5) Support thesoftware quickly Recovery
Software including:
XENTRY/DAS V2015.7
WIS net 2015.07
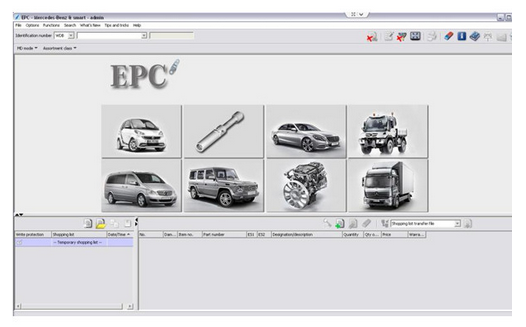
EPC net 2015.07
SD media 2014
DAS offline
Xentry Simulation
Star Utilities
Xentry developer.exe
STfinder2008: Part location finder
PL69: PartsPrice 2015.05
SmartTAN Code: Opened special function in DAS program with Smart cars450/451/452/454
Developermodel: engineer mode, remove limitations and open more
NOTE: There is no "DAS†shortcut on thedesktop. After entering the XENTRY menu, it will exchange to DAS if your car isdone via DAS.
XENTRY 21 language
Chinese,Croatian, Czech, Danish, Dutch, English, Finish, French, Geek, Hungarian,Italian, Japanese, Korean, Polish, Portuguese, Romanian, Russian, Spanish,Swedish, Turkish
WIFI MB SD Connect Compact 4 hardwareversion:
If you do not buy the laptop with softwareHDD, you need to provide us your hardware ID to activate the Star diagnosissoftware. If you get the package offerMB SD Connect C4+ DELL D630 laptop+ 2015.7V SoftwareHDD two formatoptional, software are pre-installed on Dell laptop and directly run to use.
Posted by: obdtool at
04:19 PM
| No Comments
| Add Comment
Post contains 252 words, total size 12 kb.
Mercedes Star Diagnostic C4 Pictures
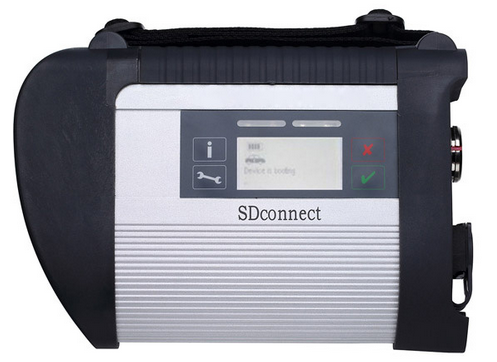 |
| Newest Update MB SD C4 Connect Compact 4 Mercedes Benz cars and trucks diagnostic tool support wireless and lan cable connection, support K line,CAN BUS and UDS protocol. |
New
V2015.3 MB Star Compact C4 Multi-language MB Star Diagnostic Tool Update via HDD
 |
MB Star Compact 4 is newly updated professional MB Star diagnostic for Mercedes Benz cars. Star C4 can do completely same function as MB Star Compact 3, and C4 with smaller size and lighter weight. Support K-line and CAN BUS Protocols.
MB STAR Compact C4 Fit IBM T30
|
 |
| Newest 2014.03V MB STAR C3/C4 Software HDD Removable Format with a free activation. The new generation Mercedes Benz diagnostic equipment Star Diagnosis compact 4 is the latest one on market for all current and new coming MB vehicles. |
Posted by: obdtool at
04:13 PM
| No Comments
| Add Comment
Post contains 202 words, total size 5 kb.
FAQ for MB SD Connect Compact 4 Language Available and Activation/Code
FAQ for
MB Star C4 SD Connect Language Available and Activation/Code
About Language Available
Q: Is MB SD C4 DAS available with 21 languages and optional to reset? Or only English available?A: The DAS on the desktop is only English available, after enter into Xentry you are allowed to set the language you want. Just enter into Xentry whatever car models you want to diagnose, and if the car model should be diagnosed and programmed in the DAS but you enter Xentry, it will automatically switch into DAS and the DAS language will be as the same as the Xenty language.sdc4 language
About Activation / Code
Q1: when I setup MB SD connect compact 4 hard disk; I got a message reading "No access authorization code! Please contact the Star diagnosis call centerâ€.sdc4 authorization codeA1: It needs activation, please send us Hardware fingerprint, LAN-ID and HW-ID, then we will help you active.
Q2: When I open EPC of MB SD C4 2012.11 (SP100), I got error message "unable to start application programâ€, what’s the reason?A2: Firstly, make sure EPC is activated. Secondly, make sure enter EPC from "EPC NET EXPLORER †and find out LAN ID, finally active it (A part of users tend to directly start EPC from Xentrty, this is not correct.) Still have got the same error? Please contact us for remote assistance.
Q3: After I get MB SD connect c4 activation file, I have no idea how to use it, active by star utilities or by EWA NET?A3: We have video tutorial, please click column "Video†to watch. Important note: make sure enter EPC from "EPC NET EXPLORER †and find out LAN ID, finally active it.
Q4: I insert the DELL D630 hard disk of
SD Connect C4 into the computer and then turn on the computer; it asked me for administrator code, what is this code?
A4: This administrator code is: User$star2004
Posted by: obdtool at
04:04 PM
| No Comments
| Add Comment
Post contains 329 words, total size 3 kb.
250kb generated in CPU 0.0225, elapsed 0.0373 seconds.
30 queries taking 0.0228 seconds, 101 records returned.
Powered by Minx 1.1.6c-pink.


